Hey there, let’s cut to the chase—if you’ve got a stack of decorative plastic jars lying around (or you’re a brand restocking on our durable, food-safe stock) and you’re staring at them like, “These are fine, but I wanna make them stand out,” you’re in the right spot. I’ve spent the last 5 years shipping plastic jars to small businesses, craft lovers, and even big-name candle brands, and let’s be real—decorating these things isn’t just about slapping stickers on. It’s about balancing that lightweight, shatter-resistant plastic we all love with decor that lasts, doesn’t peel, and actually works for whatever you’re filling ’em with. No fancy, overpriced tools needed here, just real tips I’ve tested with customers and even my own messy garage craft nights. Decorative Plastic Jar
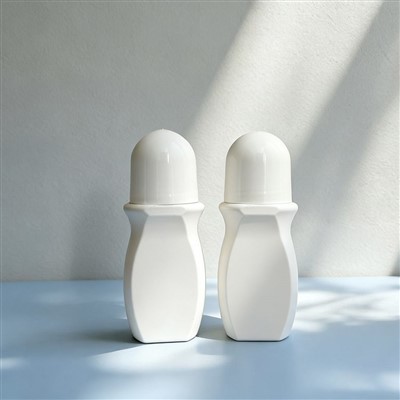
First off, let’s get one thing straight: not all plastic is the same. The decorative plastic jars we sell are mostly polypropylene (PP) or PET, right? Those are the workhorses for things like candles, bath salts, pantry snacks, or small trinkets. If you grab the wrong decor trick for your plastic type? You’ll end up with a design that flakes off after a week, or worse, melts a tiny spot on the jar. I’ve had a customer email me once saying she used spray paint meant for metal on a PP jar, and it bubbled so bad she turned her kitchen counter into a sad paint mess. So we’re starting with a quick 2-minute plastic ID hack: if your jar has a number 1 or 5 on the bottom (that little chasing arrows symbol), you’re good to go for most of the tricks we’ll cover today. If not? Stick to the super gentle ones at the end—worth noting if you’re using our specialty jars, like the frosted ones for cold process soaps.
Now, let’s break this down by how long you want your decor to last, and what you’re using the jar for. Because if it’s a snack jar you’re gonna wash weekly? You need something waterproof. If it’s a decorative jar for your coffee station that never gets moved? Go wild with fun stuff that’s easy to swap.
Let’s start with the no-fuss, beginner-friendly moves—perfect if you’re a small batch maker testing designs, or just decorating a few jars for your own home. The biggest hack here is prep work. I know, I know, everyone says “clean the surface” but for plastic, this is non-negotiable. Grease from factory assembly (yes, even new jars have a tiny bit) or finger oil will make anything not stick. Here’s my go-to prep: wipe the jar with rubbing alcohol (the 70% stuff works, no need for the fancy medical grade) and a lint-free cloth, then let it dry for 10 full minutes. No rushing this—I once skipped drying and had a sticker fall off a candle jar 2 hours after I shipped it. Embarrassing.
For the beginner crew: vinyl stickers. Duh, right? But it’s not just slapping a design on. Weed that vinyl slow—especially if it’s intricate, like little flowers or cursive. If you mess up a tiny detail, grab a pair of tweezers (not your nails—trust me, nails bend vinyl) and fix it. Also, if you’re using clear vinyl on a frosted jar, test a tiny corner first—sometimes it doesn’t adhere as well. Pro tip: run a credit card over the top of the sticker after you lay it down to get rid of air bubbles. I keep a beat-up old Visa in my craft bag just for this. It works way better than a fancy scraper.
If you want something a little more custom than a pre-made sticker, use adhesive vinyl you print at home. Most home printers can handle that now, right? Just make sure you get the “permanent” adhesive kind, not the removable stuff. Removable vinyl will pop off when you’re packing samples. And if you’re decorating a jar for bath salts or something that might get a little damp, grab a clear overlaminate sheet to stick over the top. That’s a $5 fix at any office supply store, and it makes the design waterproof. A customer who makes bath bombs told me this trick kept her jar labels from peeling in the shower for 6 months. Game changer.
Now, if you’re ready for something that’s not vinyl—something that’s a little more tactile, for when you want your jar to look handcrafted but still hold up—let’s talk about paint. But here’s the thing: regular craft paint (the acrylic stuff you use for canvases) will peel off plastic. I learned that the hard way when I tried to paint my kid’s snack jar for his soccer snacks, and by the end of the week, it looked like a flaky mess. So you need paint made for plastic. Wait till you hear this: there’s actual acrylic paint labeled “for plastic” that works way better than anything else. You can get it at Michaels or Amazon, no weird specialty stuff. It dries matte or glossy, doesn’t chip, and if you do a light sanding first (super fine grit sandpaper, like 220 grit—no rough sandpaper, you’ll scratch the jar), it sticks even better.
If you want to get fancy with paint, do ombre layers. It’s way easier than it sounds. Squeeze a little of your lightest color (like pale pink) on a paper plate, then your middle color (rosy pink) next to it, then your dark color (deep magenta) on the end. Dip a clean paintbrush into the lightest, then barely touch it to the middle, so they blend a little. Paint the bottom ⅓ of the jar, then wipe the brush and do the middle ⅓ with a little more of the middle color, etc. Wait 1 hour between coats, and do 2 total. Let it dry 24 hours before you use it. I had a candle maker order 200 clear jars last month, and she did an ombre effect for her fall line—they sold out in 3 days. No lie, she texted me a photo of a customer holding one like it was a celebrity.
Another fun paint trick: chalk paint. Wait, chalk paint on plastic? Yeah, but only if you seal it. It gives that vintage, shabby chic look that’s huge for pantry jars. Paint the jar with chalk paint (any color, even white) and let it dry 2 hours, then wipe a little with a damp paper towel to make it look “distressed” (faintly, not like you’re wiping all the paint off), then seal it with a clear acrylic sealer. The water-based kind, not the spray sealer that smells like a chemical plant. That’s it—your flour jar will look like it’s from a fancy kitchen store, not a Target dollar bin. A lot of my small business customers use this for their bulk spice jars, and they say it beats buying pre-labeled glass jars by a mile because it’s cheap and customizable.
Now, if you’re feeling adventurous and don’t mind a little extra work—something that will make your jar stand out in a sea of boring decor—let’s talk about decoupage. No, not the old glue-and-paper mess your grandma did. Modern decoupage is actually super easy and works great on plastic. Grab some decorative paper—maybe vintage book pages, napkins with pretty patterns, even tissue paper. Tear it into pieces (tearing gives a softer edge than cutting, trust me) and apply a thin layer of decoupage glue (Mod Podge works, it’s cheap) to the back of each piece, then stick it to the jar. Smooth out any air bubbles with your fingers, like you’re patting the jar. Once all the pieces are on, apply 2 more thin coats of decoupage glue over the top, letting each coat dry 20 minutes. Wait 24 hours to seal it with a clear spray sealer for water resistance. I did this on a plain plastic jar last year for my little sister’s birthday—she uses it to hold her hair ties, and it still looks perfect 8 months later. No peeling, no flaking, even when she washes it. Pro tip: don’t use printed napkins with two layers—tear off the top decorative layer only, so you don’t get that thick, crinkly middle layer that wrinkles.
Wait, what if you want something that’s not flat? Like, 3D details on your jar? That’s where hot glue comes in. But not just any hot glue—high temp hot glue, low temp will peel off plastic way easier. Draw a design on a piece of paper first (like stars, waves, your business logo) then trace it onto the jar with the hot glue gun. Let the glue dry fully (10 minutes!) because if it’s even a little soft, it’ll smudge. Then, you can paint over the hot glue with the same plastic paint we talked about, or leave it as is for a matte 3D texture. I had a soap maker order a bunch of our oval plastic jars, and she added little raised bubbles on the sides with hot glue, painted them light blue, and they looked so cool customers thought they were glass. No one believed me when I told them they were plastic. Win.
Now, let’s cover the “wait, what about if I need decor that’s super durable?” Like, if you’re selling products that go through shipping, or your jar will be washed repeatedly (like for meal prep snacks, or take-and-bake cookie kits). The trick here is to avoid anything with sticky backing that might leave residue—wait, no, permanent adhesive is fine, but also let’s talk about pad printing. That’s the industrial method we use for custom labels on bulk orders, but if you’re a small business with 50+ jars, you can find local print shops that do small batch pad printing. It’s basically printing your design directly onto the plastic, so it’s part of the jar, not just on top. No peeling, no scratching, nothing. The downside is it’s a little more expensive than stickers, but if you’re ordering 100+ jars, it’s worth it. A customer who makes vegan protein powder told me pad printing on our 16oz round jars cut her return rate by 30% because customers couldn’t peel off labels easily (they thought it was a quality defect, which it’s not, but pad printing fixed that).
Wait, let’s not forget the super simple, no-mess hacks for people who don’t wanna deal with paint or glue. Like, fabric wrap. Yeah, fabric. Cut a piece of cotton or linen fabric to fit around the middle of the jar, wrap it tight, then tie a ribbon or twine around it. Add a small tag with twine, and boom—instant rustic vibe. If you want it more secure, use a tiny dot of hot glue on the back of the fabric where it overlaps, but don’t use too much glue or it’ll show. I did this for my own candle line last year, and people loved how easy it was to swap out fabric for different seasons. Winter = red plaid, summer = gingham, boom.
Or, add hardware. Like, little metal tags, or wooden bead accents. You can get self-adhesive metal tags at craft stores, or just hot glue a few wooden beads to the bottom of the jar. For the lid, you can wrap a piece of jute twine around the top, or even add a little cork stopper if your jar has an opening that fits. My friend who makes essential oil blends uses our 8oz square jars, adds a metal tag engraved with the oil name, and sells them for $12 a pop. Simple, but it looks way more high-end than a plain jar.
Now, a few mistakes I see people make all the time—let’s get those out of the way, so you don’t waste time or money. First, don’t use regular masking tape for stencils. The adhesive on masking tape is too strong for plastic, and it’ll pull off paint or even the plastic itself when you peel it. Use painter’s tape that’s labeled “low adhesion for plastic” or the kind meant for delicate surfaces. Second, don’t rush drying times. If you put a sticker on before the surface is fully dry, it’ll bubble. If you paint before the base coat is dry, it’ll smudge. I learned this when I decorated 10 jars for a craft fair, rushed the drying, and had 8 of them ruined. Third, test everything first. Pick a random jar, do a tiny test patch of whatever decor you wanna use, let it dry, then twist it, rub it, get it a little damp, and see if it holds. No surprises at the craft fair, trust me.
And one last thing—when you’re decorating plastic jars, think about the purpose. If it’s a jar for dry pantry goods like rice or pasta, waterproof stuff is key because you’ll spill a little water when you wash it. If it’s a decorative jar for your desk that holds pens, go wild with whatever—stickers, decoupage, whatever makes you happy. If you’re selling products, match the decor to your brand. Minimalist brand = vinyl text, boho brand = decoupage with book pages, cute kids brand = hot glue stars painted bright colors. That’s how you make your jars stand out from every other seller on Etsy or Amazon.
Hey, if you’re someone who’s got a big order lined up, or you’re just starting out and need help picking the right jar for your decor plan—we’re here for it. No stuffy sales calls, no confusing hoops to jump through. If you wanna chat through what you’re making, what kind of decor you have in mind, and figure out the best jar for your needs, just reach out. We’ve shipped thousands of decorative plastic jars to people just like you, and we can hook you up with stock that’s perfect for whatever decor trick you wanna try.
Now, a quick note: when decorating plastic, prioritize non-toxic products if you’re filling the jar with food, candles, or anything that touches skin. Most of the paints and glues I mentioned are non-toxic when dry, but double-check the labels—never use craft paint that’s labeled for “decor only” on something that will touch food.

Last thing—stop overcomplicating this. You don’t need a whole craft room full of tools to make a plastic jar look amazing. A few stickers, a little paint, some twine, that’s it. Play around, test things, and don’t stress if your first attempt isn’t perfect. My first decorated jar had a lopsided sticker and a paint smudge, and that’s the one my little cousin still uses to hold her stuffed animal’s tiny toys. It’s personal, it works, and that’s what matters.
PET Plastic Bottles References:
- The Spruce Crafts. (2023). How to Decoupage on Plastic Surfaces.
- Society6. (2024). Best Vinyl for Adhering to Plastic Containers.
- Craft Gawker. (2022). 5 Durable Paint Types for Plastic Projects.
- Food & Wine. (2023). Safe Materials for Decorating Food Storage Jars.
Taizhou Fuyan Trading Co., Ltd.
As one of the most professional decorative plastic jar manufacturers and suppliers in China, we’re featured by quality products and good service. Please rest assured to wholesale bulk decorative plastic jar in stock here from our factory. Customized orders are welcome.
Address: Lupu Small and Micro Industrial Park, Lupu, Yuhuan City, Zhejiang Province
E-mail: taizhoufuyan@outlook.com
WebSite: https://www.fuyantrading.com/
